
Skip to content
Microsoft Entra PIM, inside Microsoft Teams

PIM without the portal

Request, approve and track just-in-time privileged access where your team already works. No more portal hopping or buried approval emails.
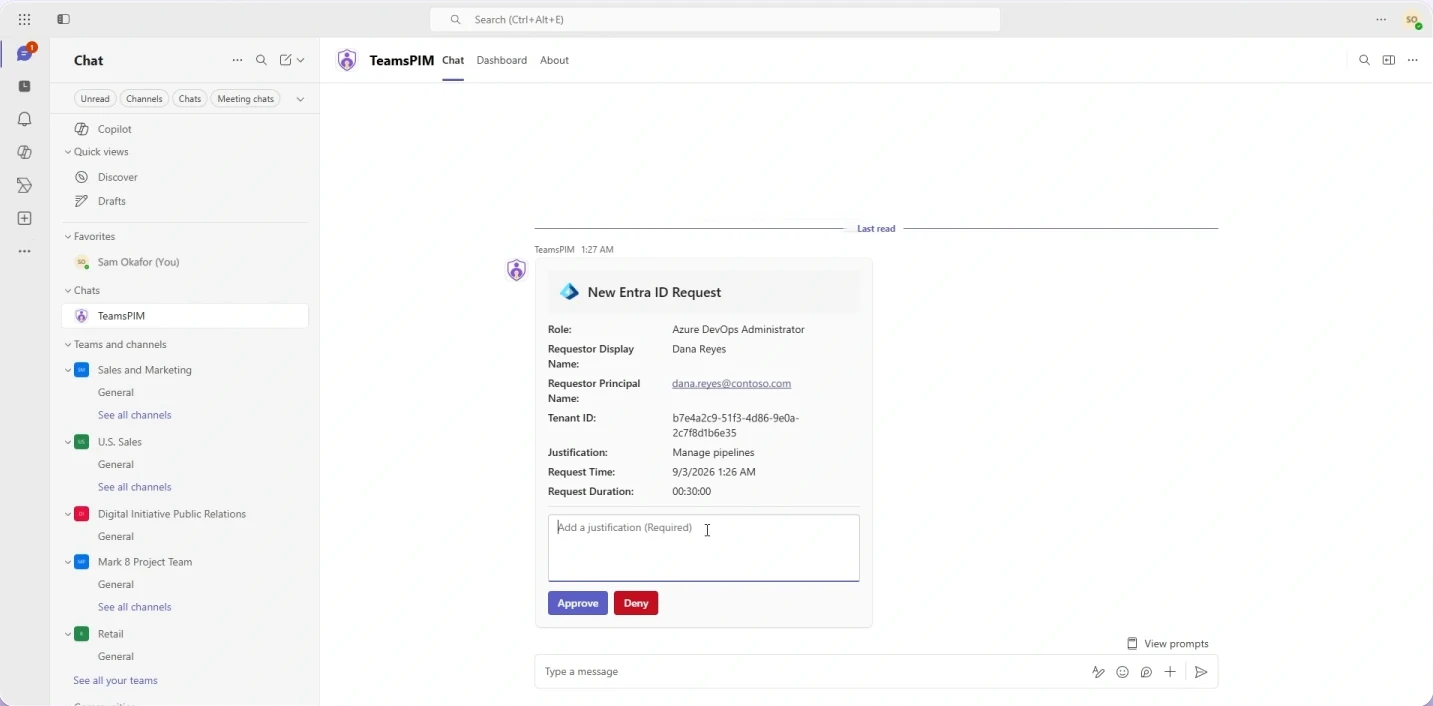
Microsoft Teams with the TeamsPIM chat open: a New Entra ID Request card for the Azure DevOps Administrator role, showing the requestor, justification, request time and duration, a required justification box, and Approve and Deny buttons.
Sample data
Why TeamsPIM

Privileged access shouldn't need a detour

Microsoft Entra PIM keeps standing admin access out of your tenant. But activating a role means a trip to the Azure portal, and approving one starts with an email. TeamsPIM moves both into Teams.

Before: PIM approvals in email, activations in the portal, your team in Teams, shown as an Inbox, a Portal and a Chat window with arrows looping between them. With TeamsPIM: request in Teams, decide on the card in the chat, then track the time left on the dashboard, shown as a single Chat window with an approval card and a check mark.Before: PIM approvals in email, activations in the portal, your team in Teams, shown as an Inbox, a Portal and a Chat window with arrows looping between them. With TeamsPIM: request in Teams, decide on the card in the chat, then track the time left on the dashboard, shown as a single Chat window with an approval card and a check mark.
Built on Microsoft Entra PIM

Security stays where it is. Only the detour goes.

TeamsPIM doesn't replace PIM or copy your role data. It works through Microsoft Graph and Azure Resource Manager, so your existing PIM settings stay in charge.

Your policies, enforced

Every activation runs through Microsoft Entra PIM, with the same maximum durations, approvers, MFA, ticketing and Conditional Access requirements.

Real identities, full audit

People request and approve with their own Microsoft account, so PIM records exactly who asked, who decided and why.

Just-in-time, just enough

Roles stay active only for the hours requested, with a countdown and a reminder five minutes before access ends.

How it works

From request to active role, without leaving Teams

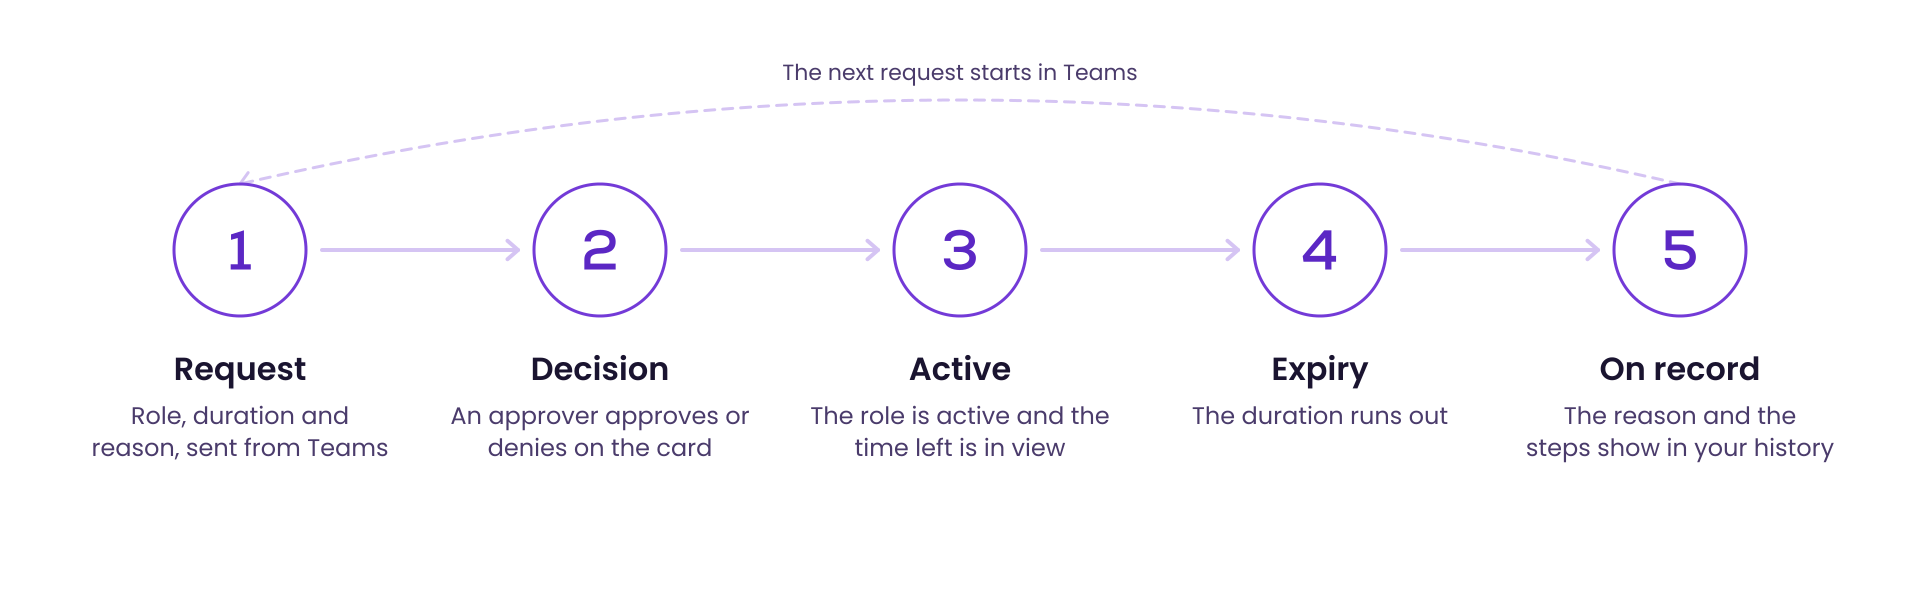
The request lifecycle in five steps. Request: role, duration and reason, sent from Teams. Decision: an approver approves or denies on the card. Active: the role is active and the time left is in view. Expiry: the duration runs out. On record: the reason and the steps show in your history. The next request starts in Teams.The request lifecycle in five steps. Request: role, duration and reason, sent from Teams. Decision: an approver approves or denies on the card. Active: the role is active and the time left is in view. Expiry: the duration runs out. On record: the reason and the steps show in your history. The next request starts in Teams.
  1. Request

    Pick an eligible role in the Dashboard tab, set the duration, add your reason and select Activate.

  2. Decision

    Approvers named in the role’s PIM settings get a card in their TeamsPIM chat and select Approve or Deny.

  3. Active

    The role is active and the time left is in view on the dashboard, with a reminder five minutes before it ends.

  4. On record

    The reason and each step show in your request history.

Features

Everything PIM users do every day

Built for the people who request and approve privileged access, not just the people who configure it.

Roles, groups and Azure

Activate Microsoft Entra directory roles, PIM for Groups membership or ownership, and Azure roles on subscriptions and resource groups.

One-click repeat requests

Most Frequent PIM Requests lists the roles you activate most, each with its own Activate button.

Approvals in chat

Approvers review the role, requestor, reason and duration on an adaptive card, and every approver’s card shows who decided.

Activity-feed notifications

Approvals, denials and expiry warnings arrive in the Teams activity feed, so nobody has to watch their inbox.

History and reports

My Requests keeps a month of history, and admins with a reporting role get PIM reports on assignments and activations.

Wherever Teams runs

Works in Teams on desktop, web and mobile, and follows your light, dark or high-contrast theme.
See it in action

A request, start to finish

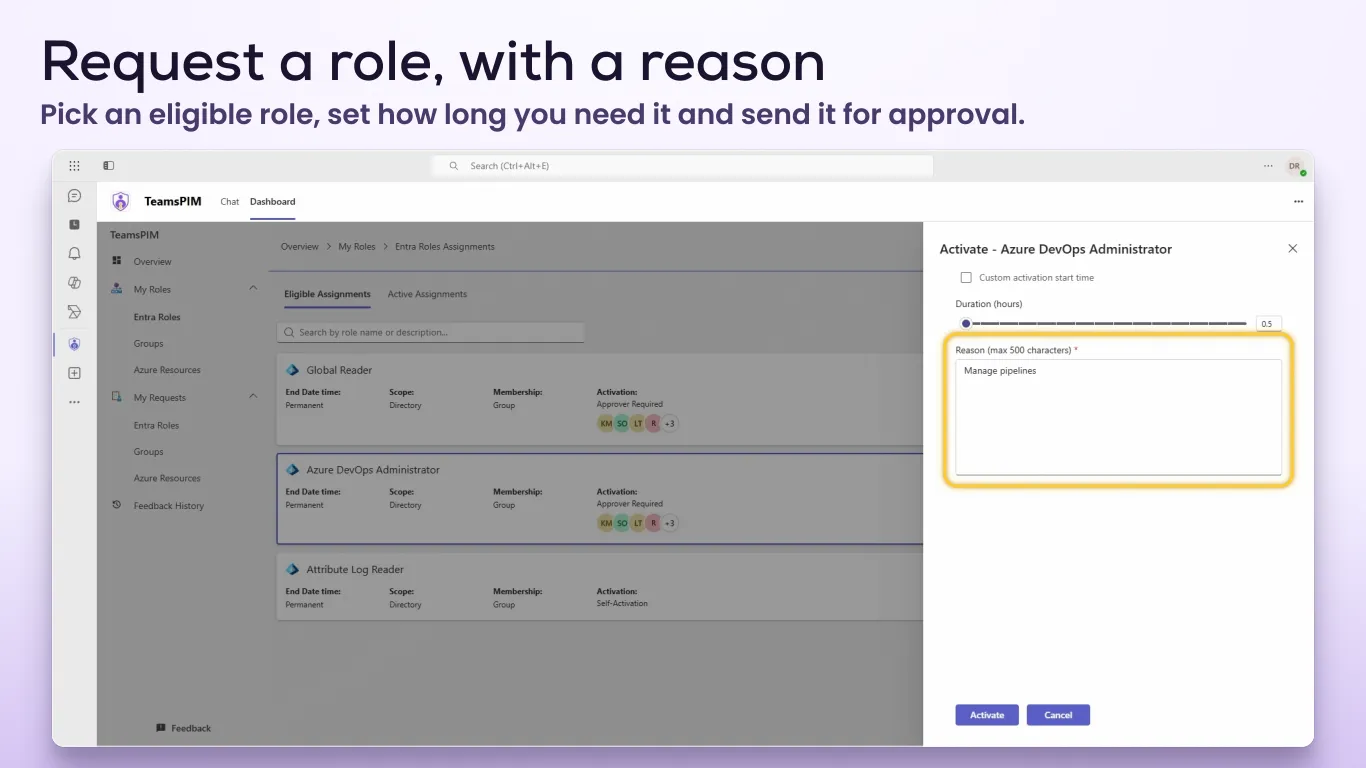
Request a role, with a reason: the TeamsPIM Dashboard in Teams with the Activate drawer for Azure DevOps Administrator open and the Reason box highlighted. Sample data.

Ask with a reason

Your eligible roles, groups and Azure resources are listed under My Roles. TeamsPIM reads each role’s PIM settings, so you see up front whether it needs approval, MFA or a ticket number, and how long you can ask for.
How to request a role →

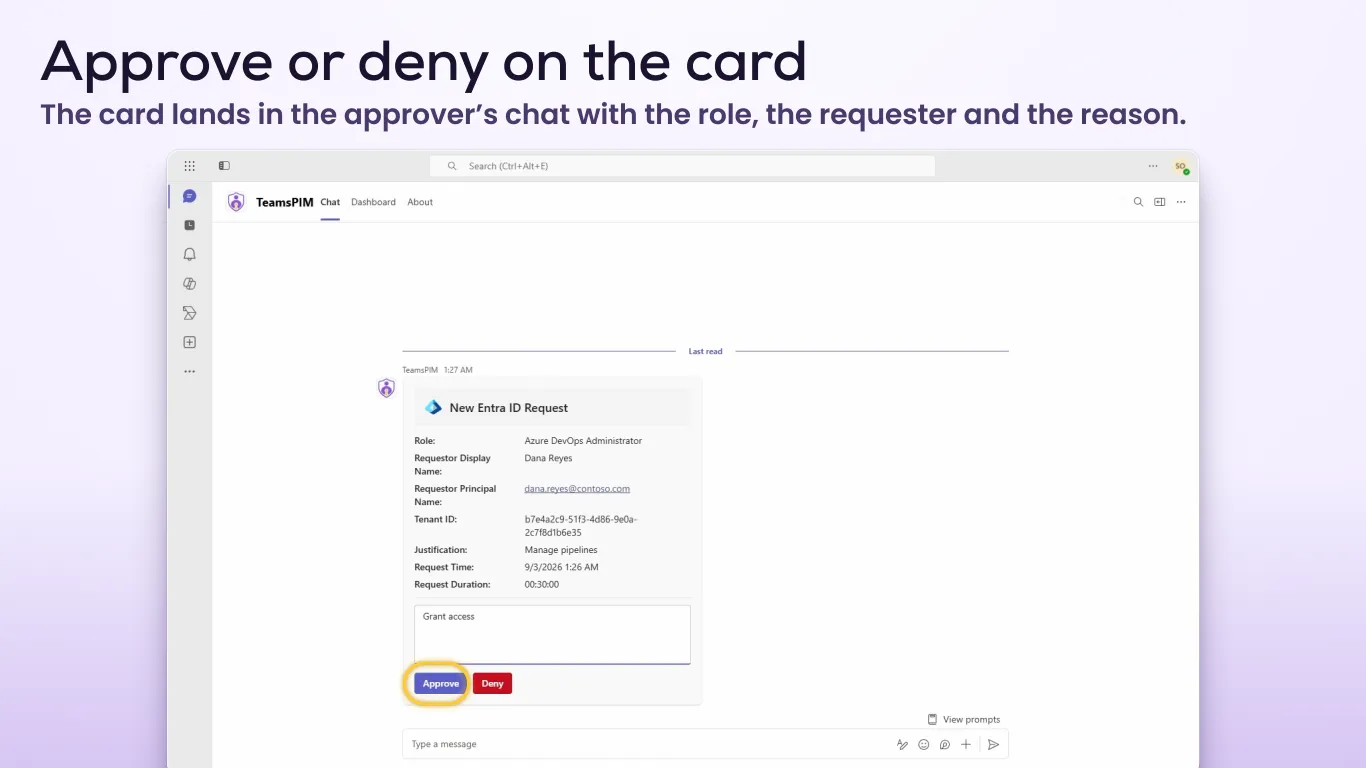
Approve or deny on the card: a New Entra ID Request card in the approver’s TeamsPIM chat with the role, requester and reason, a justification entered and the Approve button highlighted. Sample data.

Approve where you already are

Approvers get a card with everything they need to decide: the role, who asked, their reason and how long for. A justification is required, and the decision is made with the approver’s own identity.

How approvals work →

Requirements

What you need

  • Microsoft Entra ID P2 or Microsoft Entra ID Governance for the roles you manage
  • Privileged Identity Management in use, with eligible assignments for your users
  • Admin consent for TeamsPIM from a Global Administrator
  • A TeamsPIM subscription from Microsoft AppSource, and a licence for each user
  • Work or school accounts. Personal Microsoft accounts aren’t supported.

Full requirements →

TeamsPIM — PIM without the portal

Bring PIM into Teams

Set up TeamsPIM for your organisation in a few steps, then let people request and approve access where they already work.